
Small Pantry Organization Ideas That Actually Last
A pantry photographs best on the day it’s finished. Every label faces forward, every bin holds exactly as much as it should, and the rice is in a canister instead of a bag closed with a chip clip.
Three weeks later there’s a cereal box lying sideways on top of the snack bin, a bag of flour parked next to the canister it wouldn’t fit into, and a grocery haul stacked on the floor.
Nothing broke. The system just met a normal Tuesday.
What follows is built for the pantry most people actually have — a reach-in closet 24 to 36 inches wide, 14 to 20 inches deep, four or five fixed wire shelves, one door that swings into the kitchen. Cabinet pantries and walk-ins have different weak points, and those get their own notes further down.
The Week Three Autopsy
Small pantries don’t fail randomly. They fail in the same five places, and every one of them is a design problem rather than a discipline problem.
The bins were deeper than your patience. A 14-inch bin on a 16-inch shelf holds a lot. It also has to come all the way out before you can see the back half, and a bin loaded with cans weighs 12 to 15 pounds. By week three you’re reaching over the front row instead of pulling, and the back two inches become a fossil layer.
Categories multiplied. Fourteen categories in a four-shelf pantry means every single item needs a judgment call on the way in. Baking or breakfast for the oats? Snacks or kids for the granola bars? Judgment calls get skipped when your hands are full, and skipped decisions land on the nearest flat surface.
Refilling got harder than the original mess. Decanting works beautifully until you’re doing it at 6 p.m. with a funnel you can’t locate. The bag goes next to the canister “for now,” and now you have two of everything.
The label was on the bin. Bins get carried to the counter and come back one shelf lower. The label is still correct and the location is not, which quietly teaches everyone in the house that labels don’t mean anything.
There was no slack for a spike. Every American pantry gains volume twice a year — the August snack surge, the November baking pile — plus whatever a warehouse-club run drops on you. A pantry loaded to 100% on day one has nowhere to put the twelfth can of pumpkin.
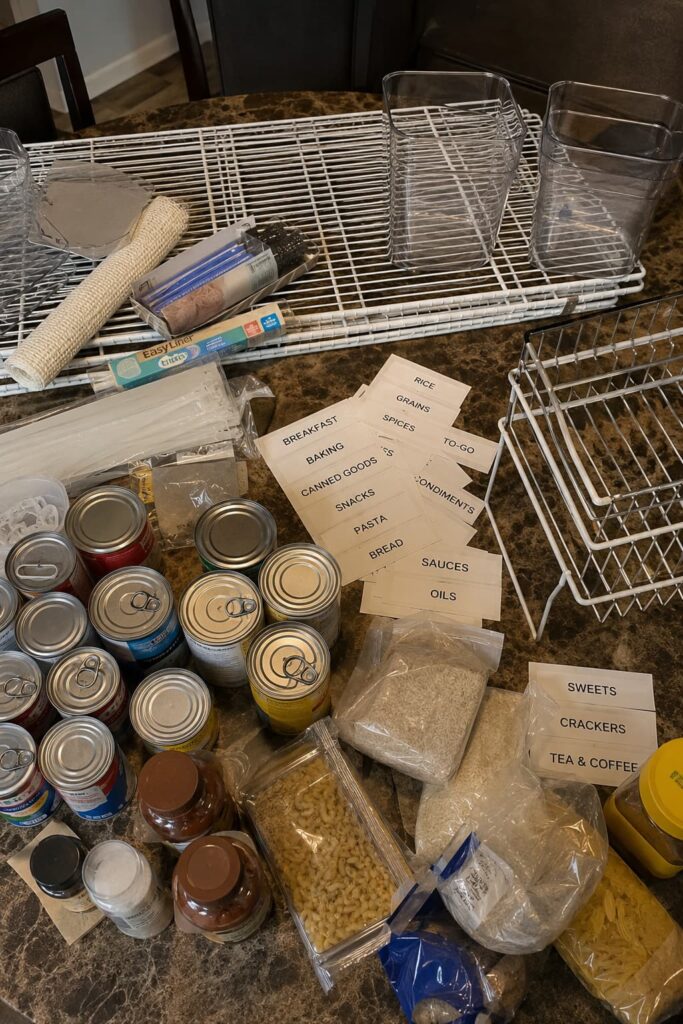
What This Actually Takes
| Hands-on time | 2¼ to 3 hours, not counting the shopping trip |
| Can you split it? | Yes. Empty and sort one evening, contain and label the next |
| Core budget | $70–$135 at a big-box store, or $25–$40 with dollar-store substitutes |
| Difficulty | Easy. The only step that needs tools is adding a shelf |
| Have on hand | Tape measure, trash bag, donation box, all-purpose cleaner, painter’s tape, Sharpie |
| Best timing | Early September, or the first week of January before the pantry refills |
Where the hours go: empty and wipe, 30–40 minutes. Sort, toss, set aside donations, 30–45 minutes. Measure and plan, 15 minutes. Line the shelves and place containers, 30–40 minutes. Load and label, 30–40 minutes.
Four Measurements That Decide What You’re Allowed to Buy
| Measure this | Typical reach-in | What it controls |
|---|---|---|
| Shelf depth, front lip to back wall | 12, 16, or 20 in | Maximum bin depth: this number minus 1 inch |
| Vertical gap at the tightest shelf | 11–16 in | Whether cereal boxes (12–13 in tall) fit anywhere |
| Shelf front to the closed door | 2–6 in | Over-the-door racks need 5 in; slim wire versions need 3 in |
| Door opening vs. closet width | 24 in door, 30 in closet | The outer 3 inches on each side is a blind corner |
Write all four on a strip of painter’s tape and stick it to the back of your phone before you shop. Nearly every returned pantry bin was bought by someone who guessed.
Make the Wire Shelves Stop Working Against You
1. Line every shelf with something rigid — not contact paper. Ventilated wire shelving has roughly 1-inch gaps between wires, which means anything with a base under about 2 inches tips over: spice jars, boxed pasta stood on end, single-serve applesauce cups. A roll of clear rigid liner runs $12–$20 and covers a four-shelf pantry; cut it with kitchen shears. Adhesive contact paper is the wrong tool here — it sags between the wires within a month and collects crumbs underneath. Dollar-store plastic placemats at $1.25 apiece work honestly well.
2. Cut the tallest gap in half. Builder-grade pantries almost always have one oversized gap, usually 18 to 22 inches above the bottom shelf, and nothing you own is that tall except a 12-pack of paper towels. A 12 × 6 inch shelf riser, or an expandable one that stretches to 18 inches, creates a second level in that dead air for $10–$18.
3. If two shelves sit more than 18 inches apart, add a shelf. A length of wire shelving plus two brackets runs $20–$35 at a home improvement store, and most will cut it to width for you. Renting or not drilling? A freestanding wire unit roughly 24 inches wide and 12 inches deep, set on the pantry floor, does the same job for $30–$50.
4. Check whether your shelves are actually fixed. Plenty of “fixed” wire shelves sit on adjustable wall standards with clips. If yours do, dropping the top shelf two inches costs nothing and hands those two inches to the middle shelf, which is exactly where cereal wants to live.

Zoning a Box That’s Only 16 Inches Deep
5. Cap yourself at eight categories for a four-shelf pantry. Fewer categories means fewer decisions per item, and fewer decisions means things get put back. Breakfast, snacks, baking, pasta and grains, cans, oils and condiments, backstock, and one bin that’s allowed to be miscellaneous.
6. Buy open-front bins, no lids, sized to shelf depth minus one inch. Three sizes cover a small pantry: 6 × 12 × 5 inches for packets and snack bars, 8 × 12 × 6 inches for baking, 12 × 16 × 6 inches for backstock. A lid adds two motions to every single use, and two motions is enough to make someone set the box on the counter instead.
7. Give eye level to the six things you touch daily. Eye level in a reach-in pantry is usually the second shelf from the top — about 48 to 56 inches off the floor. Coffee, breakfast, the daily snack, olive oil. Everything else negotiates for what’s left.
8. Cans belong on a tiered riser, not in a bin. A standard 14.5-ounce can is 4.4 inches tall and 3 inches across. Stacked in a bin, you read the top layer and forget the rest. On a 3-tier riser 12 to 16 inches wide, you can read 15 to 20 labels at a glance, which is the whole reason you bought a variety of them.
9. Give the blind corners to tall, boring things. In a 30-inch closet behind a 24-inch door, the outer few inches on each side are hard to see and harder to reach. That’s the right home for the backup vinegar, the big bag of rice, the vase-shaped bottle of oil — not for anything anyone needs on a weeknight.
The Refill Loop, Where Small Pantries Actually Die
10. Decant only what you buy in the same size every time. Rice, sugar, oats, coffee, pet treats. Watch the volume math: a 5-pound bag of all-purpose flour is roughly 17 cups, and a 4-quart canister holds 16 — so buy a 6-quart canister for flour or accept a leftover cup in a bag, forever.
11. Skip decanting anything with instructions on the box. Cooking times, rehydration ratios, and the brand you rotate between all live on the packaging. If you do decant, cut the instruction panel off the bag and drop it in the canister. Ten seconds, and it removes a recurring reason to search on your phone with wet hands.
12. Label the shelf, not the bin. Bins travel. Shelves don’t. Put removable vinyl labels on the front lip of the wire shelf so the location holds its meaning even when the bin is on the counter.
13. Build an overflow spot before you need one. One labeled bin — floor or top shelf — holds backstock only. When it’s full, you stop buying that thing. For a small pantry facing warehouse-club math, this single rule prevents more collapse than any container on this list.
14. Leave one shelf-third empty on purpose. A pantry packed to capacity on finishing day has no shock absorber, and the first shock arrives within a month. Deliberate empty space is what lets a Thanksgiving haul land somewhere other than the floor.
What to Buy, What Size, and What to Leave in the Store
| Item | Size | Big-box price | Cheaper version |
|---|---|---|---|
| Rigid shelf liner | 18 in × 4 ft roll, or precut mats | $12–$20 | Plastic placemats, $1.25 each |
| Open-front bins, small (×4) | 6 × 12 × 5 in | $6–$10 each | Dollar-store bins, $1.25–$5 |
| Deep bins with handles (×2) | 12 × 16 × 6 in | $8–$15 each | Plastic dishpans, $3–$4 |
| 3-tier can riser | 12–16 in wide | $10–$18 | A second shelf riser, $10 |
| Turntable | 11–12 in diameter | $8–$15 | Dollar-store version, $1.25–$5 |
| Labels | Removable vinyl or label tape | $0–$12 | Painter’s tape and a Sharpie |
Leave these in the store until the tape measure has spoken. Matching canister sets — you don’t yet know how many you need or in what volumes. Over-the-door racks — most reach-in pantries don’t have the 5 inches of door clearance they require. Turntables larger than 12 inches, which won’t spin on a 12-inch-deep shelf. Lidded bins. And any boxed “pantry organizer kit,” which is priced for the assortment and sized for a photo shoot.
Keeping It: The Sunday Five and the November Spike
The maintenance is not a footnote to this project. It’s the part that earns the word last.
Five minutes on Sunday. Pull anything sitting on the wrong shelf to the front, break down empty boxes, and glance at the overflow bin. That’s the whole ritual.
Twenty minutes at the start of each month. Front-face everything so labels read forward, check dates on the back row of the can riser, and pull the three items nobody has touched. Cook them that week or donate them.
One grocery habit does more than the other two combined: put things away by shelf, not by bag. Unloading a bag at a time forces you to visit four shelves per bag; unloading by shelf means one trip per zone, and the sorting happens on the counter where you can see it. This is the exact moment most systems break, and it’s a 90-second change.
The seasonal spikes are predictable, so plan for them. August brings lunchbox snacks and needs a dedicated bin, not a corner. November brings baking supplies — flour, sugar, evaporated milk, chocolate chips — that arrive together and leave together, so give them one container that comes out in November and goes to the garage or basement in January. April is the right time to pull everything, wipe the liner, and reset categories that have drifted.
Household buy-in comes down to two things. Labels have to be readable from the kitchen doorway, not just up close. And one snack bin has to sit at the height of the shortest person who takes snacks, or that person will excavate the middle shelf every afternoon.
Where This Advice Changes
Cabinet-style pantries (a run of uppers and lowers, 12 to 24 inches deep) have solid shelves, so skip the liner entirely and put that money into turntables — an 11-inch turntable does more good in a cabinet than any bin, because cabinet depth hides more than closet depth does. Labels go inside the door on a small list, since there’s no exposed shelf edge to label.
Walk-in pantries fail at the floor and the corners rather than the shelves. Anything below knee height disappears within a month unless it’s on wheels or in a bin with a handle. The overflow rule matters even more, because a walk-in gives you enough room to hide two years of expired food.
Deep shelves — 20 inches or more — are the one case where it’s worth spending real money. Pull-out sliding baskets run $25–$60 each and genuinely beat bins there, because 20 inches is past the depth where reaching stays pleasant.

What This Won’t Fix
Containers can’t create volume. If four or five people eat out of a closet with roughly 20 linear feet of usable shelf and you shop in bulk monthly, no arrangement of bins will hold it — you need a second location. A single set of garage shelves or the top shelf of a linen closet, labeled and treated as backstock, solves what another $60 of bins won’t.
It also won’t fix a pantry that’s structurally wrong for food: no ventilation, a shared wall with the oven, or shelves so deep and so far apart that they’re really a coat closet with crackers in it. Rebuilding the shelving is a $150–$300 materials project and worth considering if you own the place.
And if you’re the only person who cooks and bags in bins genuinely don’t bother you, skip decanting altogether. It’s the highest-effort, lowest-durability piece of every pantry system sold.
Questions People Ask About Small Pantries
How much does it cost to organize a small pantry? $70–$135 for a full container kit at a big-box store, or $25–$40 with dollar-store bins and placemat liners. Skipping canisters is what moves the number most.
What size bins fit a wire pantry shelf? Shelf depth minus one inch. Most reach-in pantries are 16 inches deep, which puts you at 12- to 14-inch bins. Check the door opening too — a bin wider than about 22 inches is awkward to angle out of a 24-inch door.
Should I take food out of the boxes? Only for items you buy in a consistent size and use constantly. Keep the packaging on anything with cooking instructions or any brand you rotate.
Do I need a label maker? No. Painter’s tape and a Sharpie for the first 30 days is smarter, because your categories will change once you live with them. Spend $8–$12 on removable vinyl labels after they settle.
How do I keep a pantry organized with kids around? One bin at their height, labeled with a word and a picture, holding only things they’re allowed to take. Nothing they want above it, or they’ll climb.
How often should a pantry be reorganized? Full reset twice a year — early September and early January match the American grocery calendar best. Five minutes weekly in between.
The Screenshot Version
- Measure four things first: shelf depth, tightest vertical gap, door clearance, door opening width
- Bin depth = shelf depth minus 1 inch; open front, no lids
- Line wire shelves with rigid liner or $1.25 placemats — never contact paper
- Riser in the tallest gap; add a shelf if any gap exceeds 18 inches
- Eight categories maximum for four shelves
- Cans on a 3-tier riser, not in a bin
- Blind corners get tall, rarely-used items
- Label the shelf, not the bin
- One overflow bin — when it’s full, stop buying
- Leave one shelf-third empty for August and November
- Put groceries away by shelf, not by bag
- Five minutes Sunday, twenty minutes monthly, full reset in September and January
Today’s small decision: measure the tightest vertical gap between your shelves and write the number down. That one number tells you whether cereal boxes have a legal home in your pantry — and if they don’t, you’ve just found the thing that’s been making the top shelf look messy all year.
